
It's become my mission to change the way we design and build homes in Aotearoa. This is why I'm the Canterbury Chapter Lead for The Passive House Institute of New Zealand (PHINZ), and why I have created The Healthy Home Cooperation.

I became an engineer solely to design and build my own house. While, I’ve designed many houses and even started building one, I’m still to complete a home for myself. In saying that, I have completed plenty of healthy renovation projects and embarked on my own SuperReno in 2021 which, is a work in progress.
See, I believe that you need to walk the talk, do what you say and put your money where your mouth is. There are too many people in this world pushing a barrow for their own gain, one they don’t really believe in or are not willing to fully commit to.
"To hear a little bit about my journey, click here to listen to the Homestyle Green podcast with Matthew Cutler Welsh and Simon Cator."

Hindsight is always 2020!
Background
We strive to provide happy healthy homes for people and planet. This extends across seas and borders.
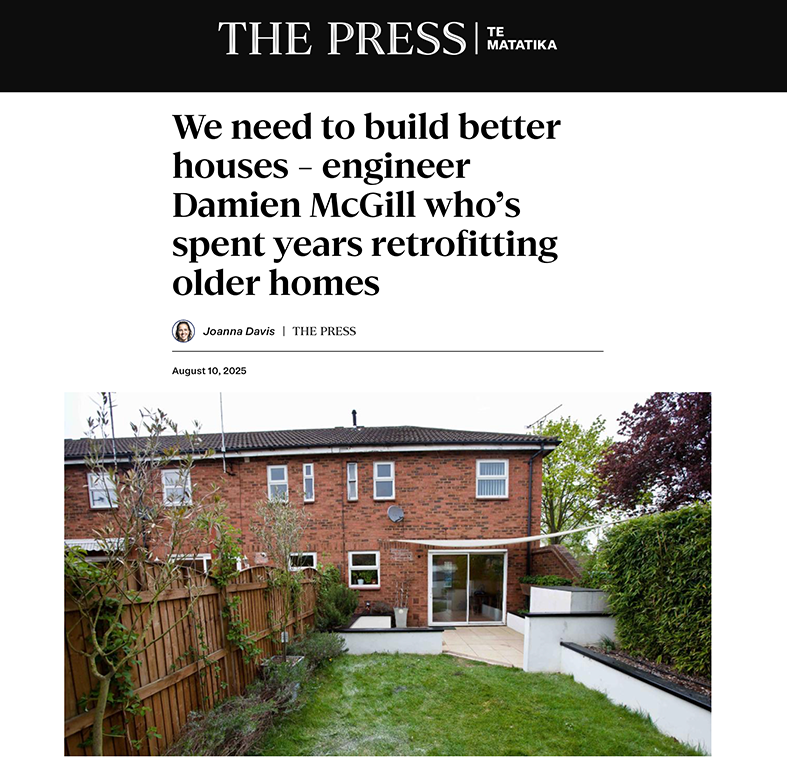
We lived in the UK for 10 years. It was our great overseas experience (OE) and we really enjoyed it. We bought an end of terrace house in Hertfordshire, while we were there, which we still own today. It could be a handy place to retire to, while avoiding the NZ winters at some point in the future. Built in the 1980's, with single glazed aluminium windows. At some point in the 1990's most of the aluminium was replaced with uPVC, which was a huge success.

Figure 1: The standard British 80’s end of terrace. New modern windows fitted.
2020's
In 2023 the aluminium patio slider started to give out after probably 30 years of service. The front door wasn't the best either. At the time the UK Government were looking to improve the minimum EPC rating for rentals from E to C by 2025. This place rates a 'D'. We understand this may have been pushed out to 2030 now?
This gave us an opportunity to upgrade the windows to something more efficient, than 1990's standards. (Still likely higher the New Zealand 2022 H1 standards).
Energy Modelling
The starting point for every new build or retrofit should always be energy modelling with the Passive House Planning Package (PHPP).To do this you need to select a window supplier. Initially I thought finding decent windows in the UK would be easy.
Finding windows
Based on my New Zealand retrofit experience and the existing windows, I wanted uPVC, preferably triple glazed, tilt and turn.
Initial enquiries were not promising. “It’s not cold enough for triple glazing in the UK”, one window supplier told us. “We don’t do tilt and turn, here,” another informed me.
Remember, the UK is not part of Europe.
A post on LinkedIn was more helpful. Some promising leads, lead to three quotes and some considerable discussion. My preferred option was to use the German Aluplast profile, which is what I’ve used here in NZ, because I’m familiar with all aspects of this system. However, the UK supplier and installer, hadn’t done an airtight install before and wasn’t familiar with ‘tilt and turn.’
The best performing windows I found were Internorm from Austria. These were providing Uw- values of 0.76W/m2K. Rw NZ R1.31. This is very good for a uPVC window, in my experience.

Figure 2: Great European Windows.
There was considerable correspondence with the supplier over airtightness and passive house standards. I was heartened by the spiel and images of airtightness tapes at the bottom of the quote.

Figure 3: Saying all the right things with all the right stamps.
In the end, as there wasn’t a great deal of viable options, we went with the Internorm supplier with a specific request to make airtightness front of mind.
What was slightly frustrating was that there were no options for electronic locking from the supplier. To assist with an airtight house, electronic locks are a great asset, as there is no hole for the key leaking air.
Energy Modelling
With no available plans for this house, we engaged a local Passive House architect to measure up the house and provide the initial PHPP model.

Figure 4: Heating demand with four variants. (CWI – Cavity Wall Insulation).
As you can see, it’s a horrible building, performance wise, especially when you consider that the Passive House Classic requirement for heating demand is 15kW/(m2a)!
However, with gas central heating via radiators, it is a warm house, which even tends to overheat on the southern rear elevation in summer. We installed a shade sail, to reduce overheating when we were living there. (Gas is now not ideal from a climate perspective, but heat pumps are still ‘new’ technology in the UK, so expensive, even with grants and subsidies.)
Supply and Installation
Windows were ordered and procured following a site survey in mid March 2024. Nothing untoward was mentioned resulting from that survey so the windows were installed mid July 2024.
First photos were sent back by the property manager showing some curious installation details, not at all what I was expecting.

Figure 5: Window install details.
My first email to the window installer was;
I've just seen photos of the window install and I'm far from happy.
1. The windows have been installed out in the brick layer, not in line with the insulation layer. High Performance windows should be installed in line with the breeze blocks. That is standard European practice. We even do this in New Zealand!
2. There is no mention of any clip install. The clip is only there so that you can hang the windows out into the cavity. If you were installing into the breeze block then you could screw directly through the frame. This would have significantly reduced the damage caused to the reveals.
3. This should be an airtight installation. I see no airtightness measures other than spray foam.
Remediation
1. Windows to be reinstalled in line with the breeze block, not the brick.
2. Don't care whether clip install or frame fix as the reveal damage has already been done.
3. A blower door test will be carried out at your expense to check the airtightness of the installation.
This of course just generated a whole lot of back and forth around terms and conditions, and how we do it here etc and general denial.
I engaged a third party to carry out airtightness testing and provide a visual inspection. This was carried out on the 21st July. He reported that;
A visual inspection and smoke pencil was used to highlight areas of weakness. It would seem although compriband tape has been used to seal the frames to the external leaf, due the placement (with an approximate 30mm overlap into the cavity), there is significant infiltration from the cavity itself. The contractor has used expanded foam to seal the frame to the reveals internally.
No internally tape seal has been used. Only expanding foam to seal the gap between the frame and the reveal. From a visual inspection and use of the borescope confirmed that there are no cavity closers installed. The as-built detail appears to be a return of the inner blockwork skin to form the jambs. Blockwork, particularly light weight blocks are quite permeable. Compounded by the mechanical fixings for the new windows and aged mortar there was significant air leakage.

Figure 6: Airtightness testing with a smoke pencil and fitting details.
The ‘Oh No’ Moment
At this juncture, late one night, I realised what the issue was. At no point during the quotation process had there been any discussion about where in the rough opening the windows were going to be installed. Or for that matter, how they were going to be fixed in place.
I had assumed that as these were high-performance windows, they’d be automatically installed within the insulation layer. I certainly wasn’t expecting them to be sitting further out in the cavity than the original ones they were replacing!
What do they say about assumptions?
This was personally frustrating, considering how much time I’ve spent agreeing details on New Zealand window retrofits.
UK Standards
So, I’ve now learned about UK Building Standards, the hard way.
Original Construction
The 1980’s wall construction is likely to look something like this.

Figure 7: 1980’s masonry construction details.
Current Construction
The current recognised construction detail is as follows

Figure 8: Modern masonry to window construction details.
It’s interesting to note that while there is an insulated cavity barrier, airtightness tape and a 10mm insulation layer against the frame, the windows themselves are still not fully recessed and are actually sitting 30mm on the brick cladding line! Quite surprising!
Current Situation
Not much has changed, while we work out the best way to fix the issues. The window installer has offered to come back and install airtightness tape. However the occupants work for a construction company, and understand what needs to be done, so may be better placed to just let them get it done.
Lesson Learnt
– Don’t assume anything!
– Agreeing installation details is especially important when doing retrofit work.
– Great windows, installed badly are not good windows.
– Don’t expect the installer to understand, even when their paperwork looks shiny.
– The window installation methods are not always better on the other side of the world.
– The country who’s building standards New Zealand aspires to emulate, builds the worst performing housing in Europe. – Make sure there is a good team around you, even if you’re in the industry and think you know what you are doing. Especially, if you’re in the industry and think you know what you are doing!
A Super Renovation
WHY: We needed to complete the earthquake repairs to the cladding and parts of the first floor are directly fixed Insulclad on timber frame, which carries the "leaky home" stigma.
There was no point bringing this property up to the same standard as the new ones going up around us, as we'd be competing with them for tenants in the future. We needed to go further.
My bet is that the tenants of tomorrow will appreciate warmer, more airtight accommodation that costs less to heat than the homes lived in by their peers.
HOW: By turning a negative into a positive and recognising that the polystryrene provides continuous thermal bridge free insulation that in addition to the wall framing gives R values of 3.55. We needed to protect this white gold! As we were overcladding, this gave us the opportunity to replace the original aluminium double glazed windows installed when the home was built in 2003.
Our budget doesn't allow us to do the work all at once. We have a five-year plan.
1. Do the South elevation this year.
2. The North elevation next year.
3. The East and West elevations in year 3.
4. Install Mechanical Heat Recovery Ventilation in year 4.
5. Increase ceiling insulation where possible in year 5.
Ideally the building consented works needs to be completed within two years, but it is usually possible to be granted a 1-year extension.
We are also monitoring the internal Enviromental Quality before during and after the work taking place.
WHAT: The following steps were undertaken to execute the works.
Waterblast the existing plaster cladding.
Epoxy inject cracking to blockwork.
Wrap with Pro Clima Solitex Extasana Adhero adhesive membrane.
Fix 70 x 40mm structural castellated cavity battens with 180mm screws and screwbolts, making sure the holes through the membrane are airtight.
Remove existing windows and doors, fully tape from membrane to inside of Gib with Tescon Extoria flashing tape.
Install triple glazed, low-e, argon filled PVC windows with Contega Exo connection strips.
Add 30mm XPS over PVC flanges to reduce thermal bridging further. Install flashings and profiled metal cladding or remesh and plaster as appropriate. Paint and replace gutters, flashings and trims as necessary. Install revels, plaster and paint as necessary.
The intention is to model the building with PHPP to see whether it is feasible to make one unit achieve the Enerfit standard for renovations. With the limited knowledge I had when I started this project, I couldn't justify the modelling to all stakeholders. In hindsight, I may live to regret this!
PROJECT PARTNERS:
Consent: Performance Architecture
Builder: Cornerstone Construction
Plasterer: GG Plastering and Painting
Cladding: Dimond Roofing
Windows: NK Windows
Flashings: Centrefold Flashings
Membranes: Pro Clima
IEQ Monitoring: Tether
It takes many people working in cooperation to build a healthy Reno


MAY 2024 | UPDATE
We received Code of Compliance for the external works in Stage 1&2 on the 13th September 2023. That was a massive milestone!
Stage 5 is now complete, with R4 Terra Lana insulation added to the accessible roof spaces of the three units.
Stage 4; MVHR is on hold for budget reasons; bringing the mortgages down took priority over air quality, unfortunately. However in the meantime, we are doing something ventilation wise. We are running a trial on negative pressure ventilation. Read about it here. https://www.healthyhome.kiwi/negative-positive-neither
In July 2024, we will start insulating the top of floor slab of Unit 3. This will involve removing the carpet and underlay, then glueing 25mm of PIR foam board to the concrete floor, then installing an engineered timber floating floor. This should improve both warmth and sharpness, but may compromise acoustics.
Of course, we'll monitor the situation to find out...


MAY 2022 | UPDATE
Stage 2 is now complete with triple glazing to all 4 elevations along with new steel cladding on the North elevation.
A range of low-e glass was installed in consultation with Metro Performance Glass and peer reviewed by thermal modelling.
Many thanks to the build team of
Sam Steele (aka Sam the scaffold man)
Rowan the Roofer (The Roofing Store)
Christian & Drew (Cornerstone Construction)
Martin, Jakub & Jonard (NK Windows)
Gerald (G&G Plastering)


HEALTHY HOME COOPERATION
Healthy Homes for all Kiwis. Housing is about people. People working together in cooperation to provide Healthy Homes for people to live in.
Damien McGill: Engineering Happy Healthy Homes for People & Planet